Tall Geese quilt block
Flying geese drawn on a 1:2 cell instead of a square one, so each goose is tall and narrow rather than the usual squat triangle.
Also known as Elongated flying geese, Slim geese, Tall flying geese.
Flying Geese is one of the handful of patterns that everyone knows, and the standard unit is a rectangle twice as wide as it is tall with a 45° triangle in the middle. Turning the proportion on its head is a modern move: the same silhouette, stretched, reads as motion rather than as a row of tidy triangles.
Tall Geese cutting chart
Cut sizes include a ¼″ seam allowance: ½″ on squares and rectangles, ⅞″ on half-square triangles, and 1¼″ on quarter-square triangles. Pick a finished block size:
| Fabric | Shape | Cut size | Qty | Notes |
|---|---|---|---|---|
| Accent | HRT rectangle, “/” diagonal | 4" × 7" | 1 | finishes 3" × 6" — sew the diagonal, then trim to 3½" × 6½" |
| Accent | HRT rectangle, “\” diagonal | 4" × 7" | 1 | finishes 3" × 6" — sew the diagonal, then trim to 3½" × 6½" |
| Background | HRT rectangle, “/” diagonal | 4" × 7" | 1 | finishes 3" × 6" — sew the diagonal, then trim to 3½" × 6½" |
| Background | HRT rectangle, “\” diagonal | 4" × 7" | 1 | finishes 3" × 6" — sew the diagonal, then trim to 3½" × 6½" |
| Dark | HRT rectangle, “/” diagonal | 4" × 7" | 2 | finishes 3" × 6" — sew the diagonal, then trim to 3½" × 6½" |
| Dark | HRT rectangle, “\” diagonal | 4" × 7" | 2 | finishes 3" × 6" — sew the diagonal, then trim to 3½" × 6½" |
| Fabric | Shape | Cut size | Qty | Notes |
|---|---|---|---|---|
| Accent | HRT rectangle, “/” diagonal | 5½" × 10" | 1 | finishes 4½" × 9" — sew the diagonal, then trim to 5" × 9½" |
| Accent | HRT rectangle, “\” diagonal | 5½" × 10" | 1 | finishes 4½" × 9" — sew the diagonal, then trim to 5" × 9½" |
| Background | HRT rectangle, “/” diagonal | 5½" × 10" | 1 | finishes 4½" × 9" — sew the diagonal, then trim to 5" × 9½" |
| Background | HRT rectangle, “\” diagonal | 5½" × 10" | 1 | finishes 4½" × 9" — sew the diagonal, then trim to 5" × 9½" |
| Dark | HRT rectangle, “/” diagonal | 5½" × 10" | 2 | finishes 4½" × 9" — sew the diagonal, then trim to 5" × 9½" |
| Dark | HRT rectangle, “\” diagonal | 5½" × 10" | 2 | finishes 4½" × 9" — sew the diagonal, then trim to 5" × 9½" |
| Fabric | Shape | Cut size | Qty | Notes |
|---|---|---|---|---|
| Accent | HRT rectangle, “/” diagonal | 6" × 11" | 1 | finishes 5" × 10" — sew the diagonal, then trim to 5½" × 10½" |
| Accent | HRT rectangle, “\” diagonal | 6" × 11" | 1 | finishes 5" × 10" — sew the diagonal, then trim to 5½" × 10½" |
| Background | HRT rectangle, “/” diagonal | 6" × 11" | 1 | finishes 5" × 10" — sew the diagonal, then trim to 5½" × 10½" |
| Background | HRT rectangle, “\” diagonal | 6" × 11" | 1 | finishes 5" × 10" — sew the diagonal, then trim to 5½" × 10½" |
| Dark | HRT rectangle, “/” diagonal | 6" × 11" | 2 | finishes 5" × 10" — sew the diagonal, then trim to 5½" × 10½" |
| Dark | HRT rectangle, “\” diagonal | 6" × 11" | 2 | finishes 5" × 10" — sew the diagonal, then trim to 5½" × 10½" |
| Fabric | Shape | Cut size | Qty | Notes |
|---|---|---|---|---|
| Accent | HRT rectangle, “/” diagonal | 7" × 13" | 1 | finishes 6" × 12" — sew the diagonal, then trim to 6½" × 12½" |
| Accent | HRT rectangle, “\” diagonal | 7" × 13" | 1 | finishes 6" × 12" — sew the diagonal, then trim to 6½" × 12½" |
| Background | HRT rectangle, “/” diagonal | 7" × 13" | 1 | finishes 6" × 12" — sew the diagonal, then trim to 6½" × 12½" |
| Background | HRT rectangle, “\” diagonal | 7" × 13" | 1 | finishes 6" × 12" — sew the diagonal, then trim to 6½" × 12½" |
| Dark | HRT rectangle, “/” diagonal | 7" × 13" | 2 | finishes 6" × 12" — sew the diagonal, then trim to 6½" × 12½" |
| Dark | HRT rectangle, “\” diagonal | 7" × 13" | 2 | finishes 6" × 12" — sew the diagonal, then trim to 6½" × 12½" |
| Fabric | Shape | Cut size | Qty | Notes |
|---|---|---|---|---|
| Accent | HRT rectangle, “/” diagonal | 8½" × 16" | 1 | finishes 7½" × 15" — sew the diagonal, then trim to 8" × 15½" |
| Accent | HRT rectangle, “\” diagonal | 8½" × 16" | 1 | finishes 7½" × 15" — sew the diagonal, then trim to 8" × 15½" |
| Background | HRT rectangle, “/” diagonal | 8½" × 16" | 1 | finishes 7½" × 15" — sew the diagonal, then trim to 8" × 15½" |
| Background | HRT rectangle, “\” diagonal | 8½" × 16" | 1 | finishes 7½" × 15" — sew the diagonal, then trim to 8" × 15½" |
| Dark | HRT rectangle, “/” diagonal | 8½" × 16" | 2 | finishes 7½" × 15" — sew the diagonal, then trim to 8" × 15½" |
| Dark | HRT rectangle, “\” diagonal | 8½" × 16" | 2 | finishes 7½" × 15" — sew the diagonal, then trim to 8" × 15½" |
How it goes together
Each goose is a mirrored pair of half-rectangle triangles meeting at the top. Sew the pairs first, trim each to size, then stack the geese into columns.
Tips
- Trim every goose before it joins the next one. A column of geese is the fastest way to accumulate error in all of quilting, and trimming resets it at every step.
- Leave a full quarter inch above the point when you trim. That allowance is what the next seam eats, and without it every goose loses its beak.
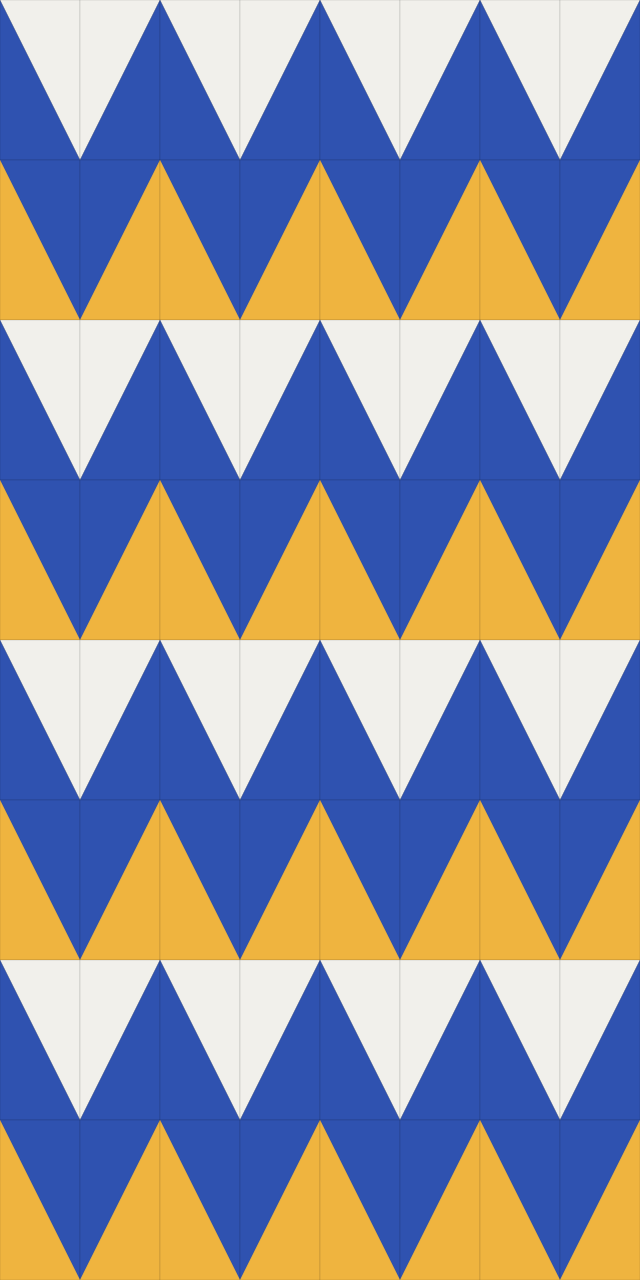
- Alternating the background fabric column by column turns a flock into a chevron without changing a single cut.
How much fabric for a Tall Geese quilt?
Yardage for a whole quilt of Tall Geese blocks, computed the way the studio does it — every piece packed across a 40″ usable width with 10% added for waste.
| Quilt size | Blocks | Finished | Top fabric | Backing | Binding |
|---|---|---|---|---|---|
| Baby 36×48 | 6 | 36" × 48" | Background ⅞ yd · Dark 1¾ yd · Accent ⅞ yd | 2½ yd | ⅜ yd |
| Throw 60×72 | 15 | 60" × 72" | Background 2¼ yd · Dark 4⅜ yd · Accent 2¼ yd | 3⅞ yd | ½ yd |
| Queen 90×108 | 40 | 96" × 120" | Background 5⅞ yd · Dark 11⅝ yd · Accent 5⅞ yd | 10¾ yd | ⅞ yd |
What it looks like in a quilt
A single block only tells you half the story. Set sixteen of them together and the secondary pattern appears where the blocks touch:
Tall Geese questions
What is the difference between this and ordinary flying geese?
Only the proportion of the cell. Ordinary geese sit in a 2:1 wide rectangle; these sit in a 1:2 tall one, which makes the triangle steeper and the row read as movement.
Can I use the no-waste four-at-a-time method?
Not directly — that method depends on the 45° geometry of the standard unit. These are made as mirrored half-rectangle triangle pairs instead, which the cutting list works out for you.